Saturday, April 20, 2013

LDV Pilot - smashed mirror... and temporary fix


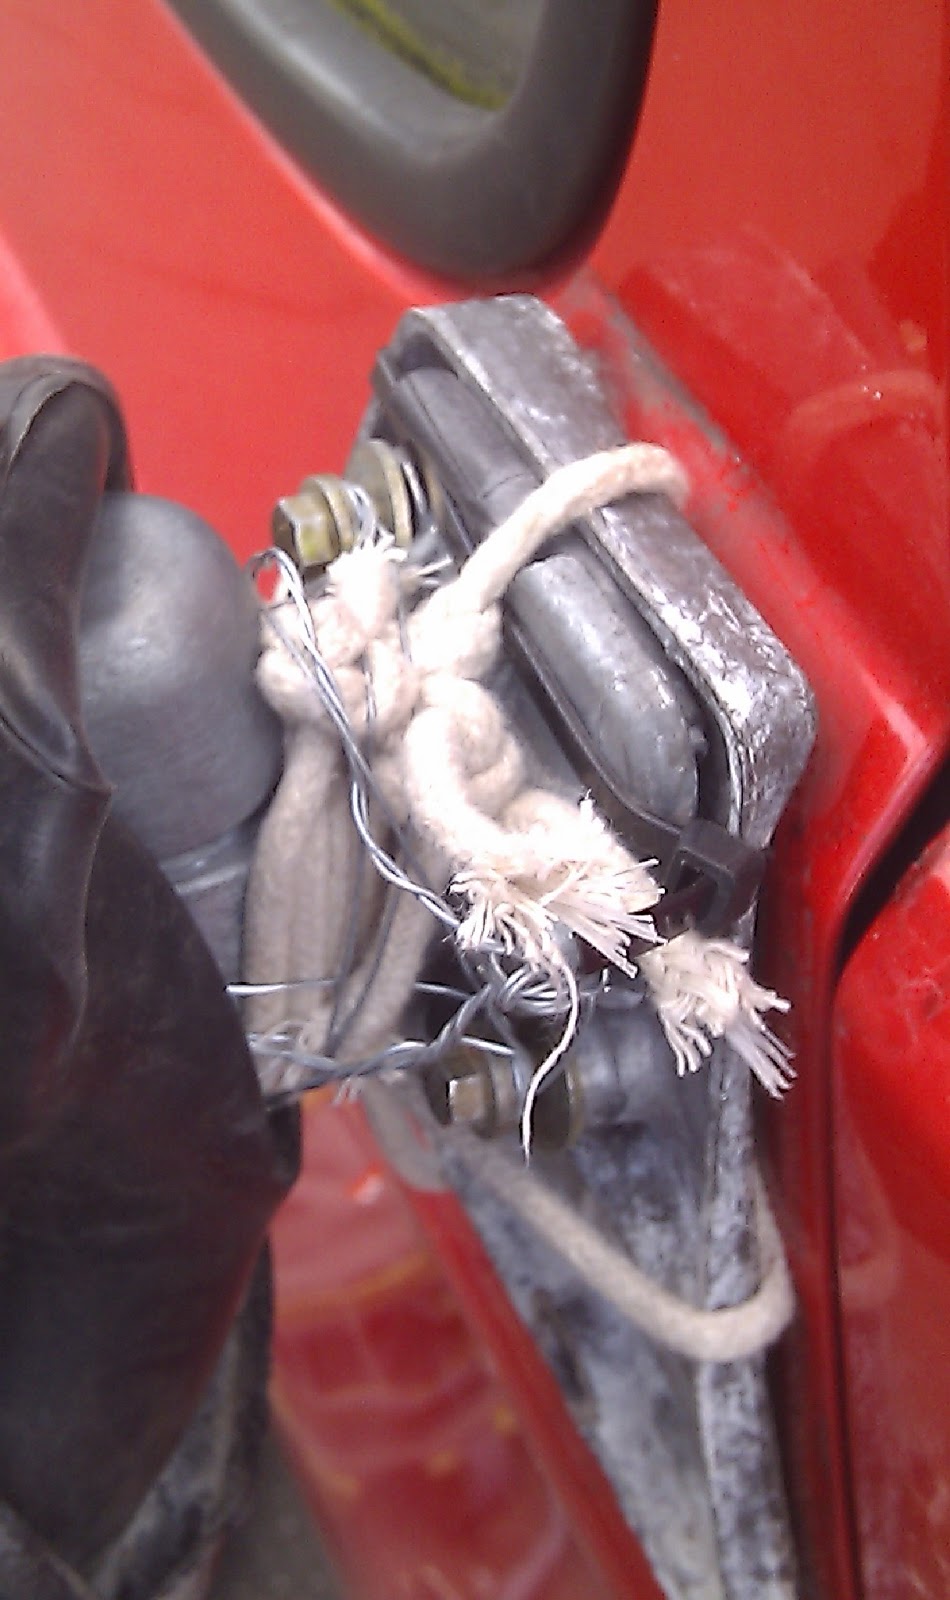
Someone's done that to the mirror of my van and ran away.
The cast alloy is smashed. The mirror itself is fine though.
Lucky I.


Looks like a dodgy fix?
It's holding on pretty well so far.
(Rope, metal wire, cable ties and inner tube cuts)


Thursday, April 11, 2013

Welding metal

Slightly off topic although a good skill to have when you own a van or any vehicle. Even a bike. And you are good enough with your hands.

Good FORUM:  http://weldingweb.com

wiki How-to > helpful read to chose the correct electrodes

A rare trade with info on how to weld aluminium correctly.

Loads here on all type of welding

videos

videos on metal and welding (Arc and MIG)

DIY welding for punks

on equipment

uk welder forum

gasless MIG

Extract from wiki 18 steps
(warning from my instructor: "never weld without protection gear on."):

Learn the steps for creating a successful weld. Welding is more than dragging a welding rod across a piece of steel and gluing it to another one. The process begins with properly fitting and securing the work pieces, or metal to be welded, together. For thicker pieces, you may want to grind a bevel so subsequent beads can be placed in the groove to fill it completely with a solid weld. Here are the basic steps for completing a simple weld.
  • Strike the arc. This is the process of creating an electric arc between the electrode and the workpiece. If the electrode simply allows the current to pass directly into the grounded work piece, there will not be enough heat produced to melt and fuse metal together.
  • Move the arc to create a bead. The bead is the metal from the melting electrode flowing together with molten metal from the base metal to fill the space between the pieces being joined by welding.
  • Shape the weld bead. This is done by weaving the arc back and forth across the weld path either in a zig zag or figure 8 motion so the metal spreads to the width that you want your finished weld bead to be.
  • Chip and brush the weld between passes. Each time you complete a pass, or trip from one end to the other of your weld, you need to remove the slag, or the melted electrode flux material, from the surface of the weld bead so only clean molten metal will be filling the weld on the subsequent pass.
http://alec.tamu.edu/LinkClick.aspx?fileticket=Y67TTX05uzY%3D&tabid=625

LDV vans spare parts

Looking for a spare mirror and few bits and bobs I went to a spare parts and repair workshop/scrap yard in Charlton-Woolwich but the (helpful) man said he hasn't seen a Pilot in a year and only had one new mirror for sale. I went to buy second hand and the new one was over my budget unfortunately.

Pilots are becoming scarce it seems.
Here is a page with a list of dealers branded LDV in UK. I think it's worth ringing them up before paying a visit.

If you happen to read this post and you know of other ones or you went to one of those on the list,
please give us details and/or feedback in a comment.

Cheers.
Here is a sample to which I'm adding two I know that are not mentioned on the list.

Best place so far and according to many dealers

online

Transit & LDV Van Parts

116 Westmoor Street
Charlton
London
SE7 8NQ

F J Keen & Son - LDV Van Centre

143-145 Battersea Park Road, Battersea
London, SW8 4BX

Dealers

>> LDV Van Dealers in the London Region are:

Double Drive Exclusive Limited
Dealer Location: London, London
Tel: 0208 965 8600  0208 965 7329
Website: www.usedvans4sale.com

Service 

Heathrow LDV Limited t/a Heathrow Van Centre
Dealer Location: London, Middlesex
Tel: 020 8897 2348  020 8897 2346
Website: www.heathrowldv.com

Sales  Service  Parts  VANfit

Morgan Elliott Croydon
Dealer Location: Croydon, Surrey
Tel: 020 8683 6200  020 8683 4023
Website: www.croydonldv.com

Sales  Parts  VANfit

West London LDV
Dealer Location: London, Greater London
Tel: 020 8481 8000  020 8481 8007
Website: www.usedvans4sale.com

Bit of LDV history...

An interesting link on the LDV factory closure with photos


Tuesday, March 12, 2013

LDV Pilot rear wheel drum and hub: changing the wheel cylinder

Ok -

This is just some basic information on how I changed the rear wheel cylinder on a 2003 Pilot - I think most cylinders in most vehicles operate the same - I watched a few video's and saw various methods and fixings - here's what I found...

BTW - there is a way to do this without taking the shoes out - but I was going to change the shoes anyway.

Stuff I needed:
Research:
http://www.youtube.com/watch?v=p8k5GfTpZr4&list=PLD3_GkY1HOeh76Y-OeWRSKgRwUZUWQ8pB&index=2 << shows the basics, LDV Pilot is a slightly different fixing on the cylinder.
http://www.youtube.com/watch?v=g4HqLoDjVRA << bit slow but shows basic start to process

- Brake cleaner (spray) brake fluid EVERYWHERE> this really helped
- phillips screwdriver for drum retainer screw
- Pliers for spring removal
- axel stands x2 (and chocks for the front wheels)
- spanner (11?) to loosen the pipe fixing to the back of cylinder
- spanner for (8/10) loosening the bleed nipple
- new wheel cylinder, possibly brake shoes if they are soaked compromised through the brake fluid
- bleeding kit / bottle and pipe (see here at 5:37: http://youtu.be/V5O_pbC8R2E?t=5m37s )

1. Loosen the wheel nuts on the offending wheel, Chock the front wheels, jack up, stick the stands under the rear axel, one each side.
2. Take the wheel nuts off, then the wheel, then the handbrake.
3. Spin the drum - it should turn freely
4. find the retainer screw, take it out
The retainer screw half out of the drum
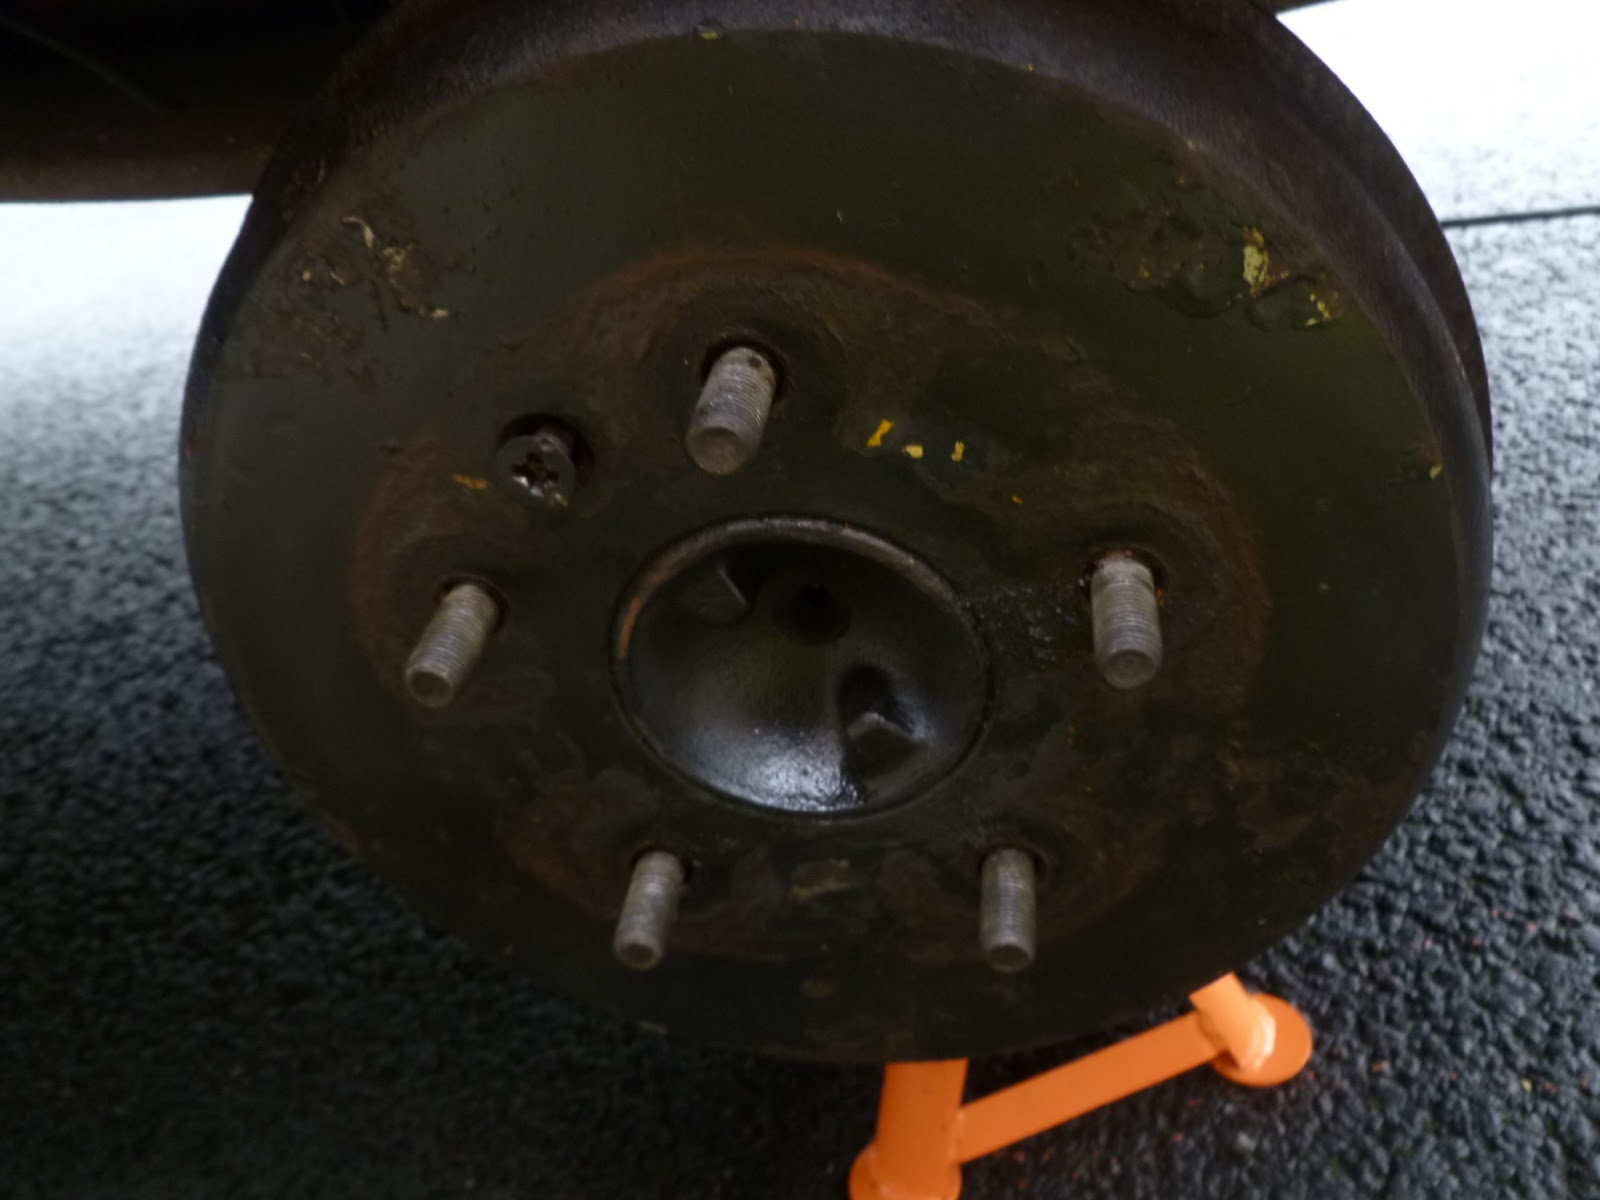
5. Either the drum slides off (not very likely) or you have to just keep hitting the drum with a hammer and turning it... it will eventually crack and begin to come off... like so;

Under the drum... this sight awaits...

6. Basically, I tool the springs out of their holes with a pair of pliers on my leatherman (thanks Ludo) but you can use long nose pliers or something else suitable... I didn't do it in any particular order, but laid the springs between the new shoes to note what went where...


 7. The handbrake is attached to the base of the right brake shoe - simply pull the metal outer cable spring back to expose the cable and slip from the fixture

handbrake cable end location 
8. With the cable and shoes removed, you can start taking the cylinder off> undo the brake pipe nut from the back of the cylinder- there will be some brake fluid leak from the pipe, you can find a way to stop the leak, such as the rubber cap for the bleed nipple.


9. Get the circlip off; slide the old cylinder away from the hub.

 10. Clean up the hub with brake cleaner, then time to fit the new cylinder; get the circlip on first as the pipe screws in easy.

New cylinder pipe and circlip on
 11. Thats the cylinder done really!

 12. Use some copper grease (I only had lithium here) just where the shoes rub on the hub to help prevent squealing - some on the back of the drum also (no pic) so its less likely to be a sod to get off the next time...


13. Get your shoes on!

14. Bleed the brakes (see video above in 'research')

As you can see here, I gave the old shoes a good clean, a brief very very fine sand, as I couldn't work out how to get this handbrake fixture off on of the shoes:


Its the next job:::

Hope this helps - let me know any questions/ advice!

Saturday, March 2, 2013

LDV Pilot van - UK regulations

Bills paid.
Road tax duty stamp at £215.00.
MOT coming up in March.

I need to fix the defectuous rear bumper which fell this morning as I lightly hit a tree while manoeuvring. Had to fix it for ages now really have to do it.
The fan belt still haven't been changed (!)
need a new extra tyre.
Need to fix the rear light better then the gaffer tape the previous owner fixed it with.

Need a look into the electrics for start up troubles.
And do the imminent address change.

Finally I'd love to take the time to properly seal the body for water leak and carry on with rust treatment as well as body repair (very appealing job for a sculptor like I).
Pics later.

LDV Pilot van - under the snow


That wasn't its favourite season. Despite a lot of Pilot's owners who claim this van always starts up, mine found it difficult under cold and wet conditions. I changed the battery to a new one but it still had troubles. I guess it's got to do with the heads not heating up properly. Something in the electrics?
Needs to be investigated further...

Sunday, February 10, 2013

DW8 engine - Alternator belt

206 DW8 ENGINE

Conversion - Insulation

Ideas from people's experience on the net:
  • Bubble wrap
  • FOIL/ LOFT-ROOF INSULATION / WALL INSULATION / DAMP PROOF 
  • Space Blanket Loft Roll Insulation 

     
    "Things to think about are weight, will it catch fire easily, how easy would it be to remove if working on body panels at a later date, will it hold moisture and also will it absorb smell, ie cooking etc if using in a camper conversion."

biofuel book

I'm not happy to promote the book here but it can be useful I guess. It's more like I'm archiving the info. Why. I do realise it is a lot of work to gather the infos and put a book together, I've done some of it myself as a graphic designer. The book can be paid for. However this information has more potential than just make us save on our fuel budget. In my opinion it could be made available for free online. That's what the WWW is meant for. (Oh yea but we live in a capitalist world). Anyways it's titled "run your diesel vehicle on bio fuels".

Saturday, February 9, 2013

DW8 engine euro 3 rating

The DW8 is for all intents and purposes an evolution of the XUD9 and is the only Diesel engine in the family not to feature a turbocharger or common-rail direct injection. It has a bore of 82.2 mm and a stroke of 88 mm for a displacement of 1868 cc. It is mainly used in vans such as the Citroën Berlingo and Peugeot Partner but can also be found in more affordable versions of the Peugeot 206 and 306. The DW8 was phased out in 2007 as it does not pass Euro IV emissions regulations (it is an Euro III engine[1]). DW8 69 PS (68 hp/51 kW) Dieselcatalyst DW8 B 69 PS (72 hp/53 kW) Dieselcatalyst

From http://en.m.wikipedia.org/wiki/PSA_EW/DW_engine#section_4

DW8 on 206
read more - images


French breathalyser news

Car breathalyser fine enforcement delayed in France until March 2013

Friday, February 8, 2013

LDV Pilot van - spare, Replacement Key

http://www.autolocksmithstockport.co.uk/cars/ldv
http://www.bancroftlocksmiths.co.uk/

LDV - random knowledge on common faults and more

Help! I have an ex Post Office LDV Pilot with an immobiliser.

kingpins!!!!!!! new or pack with grease

History

LDV

LDV is a famous UK van manufacturer, located in the Drews lane area of Wolseley, Birmingham, England. It was a part of the British Leyland/Rover Group empire and was the latter's Freight Rover arm of the Land Rover Group division. It was officially known as LDV Limited after its merger with Leyland Trucks and DAF Trucks in 1987. The company manufactures various panel vans, pick-ups and minibuses. These vehicles are available with various modifications and specifications. The Convoy and Pilot panel vans were amongst the first modified versions of Leyland DAF 400 Series of vehicles. They were produced between 1997 and 2006. The convoy was available as 2.8 tonne, 3.1 tonne and 3.5 tonne variants with load volume capacities of up to 12.9 cubic metres. The pilot was made available in capacities ranging from 2.2 to 2.6 tonnes in a 5.7 cubic metre load area. Both these vans were immensely popular as a minibus and would come as pick-up and fleet based vans. These vans were replaced by an LDV van, the Maxus. Maxus van was launched in 2005 and was awarded the Professional Van and Light Truck Magazine ''Van of the Year 2005'' title. It is available in two wheelbases, three roof heights and a choice of 2.8t, 3.2t and 3.5t GVW. It is being used on fleet basis by companies such as Transco, Royal Mail and various UK police services. The company had also produced a small van named LDV Cub that was produced from 1996 until 2001. It was popular with small businesses such as plumbers, gardeners and electricians. The company also provides services and insurance for LDV Maxus and other LDV cars. 

Big Brother Maxus:
http://dudleyinvestigatesldv.wordpress.com/

(on LDV Pilot vans) "Rads block, if they overheat it normally wrecks the cylinder head, Rad fan switches fail, kingpins wear out quickly, shock bushes are always wearing out, steering boxes wear and leak, gearboxes can give problems with crunchy gears etc, diff seals leak, wiper linkages wear out and leak water into cab and your forever banging your elbow on the door."


Sunday, October 28, 2012

LDV Pilot van - UK miles per gallon calculator

http://www.mdocuk.co.uk/mpg_calculator.htm

LDV Pilot van - logbook - Rust treatment

The MOT document which came with the van mentioned a bit of rust on the front left but I hadn't been able to spot it til I started to treat the rusty areas of the van's body. It's located by the driver's door on the round of the wheel and it looks like it'll need that chemical I used to change rust into metal on the outside areas (mainly around the gutter and the worse being above the windscreen and doors edges) plus a fair quantity of resin to get it back as it was and stop the damage for good. There is also a worrying amount of humidity under the cabin's floor mat which I presume is the result of rust damages and cracks in dried joints. There's a good post on this forum about water leaks (but you'll need to join the forum to read it. Here's the link This, from the same forum, speaks about water leaking through the windscreen rubber joints. Common bug.

Saturday, September 8, 2012

LDV Pilot - logbook

Apparently having a speed restricter on the engine makes it last longer.

LDV PIlot - logbook

The left rear bumper need to be fixed to the body.
The left rear light needs to be fixed to its support.

LDV Pilot Van - logbook

I offered to help carry a friend's giant puppets for a Latin American festival with the van last sunday. All went well until on the way back, my (only) key got stuck in the side door's lock. I managed to get it out but the lock is not functioning with the key anymore. I need to open it from the inside.
Not a big deal. It's more worrying that I only have one key for this van.